


The Ultimate Guide to Growing Autoflowering Cannabis Outdoors
- 1. Introduction
- 2. Choosing the perfect autoflowering strain
- 3. Selecting the ideal location
- 4. Preparing the soil for optimal growth
- 5. Planting and germination
- 6. Nutrition and fertilization
- 7. Watering techniques
- 8. Pest and disease control
- 9. Training techniques for autoflowering cannabis
- 10. Harvesting and curing
- 11. Benefits of growing autoflowering cannabis outdoors
- 12. Additional tips for success
- 13. The significance of sunlight and light cycles
- 14. Expert opinion by jorge cervantes - co-author:
- 15. Extra tips for growing autoflowering cannabis outdoors
- 16. Conclusion
Preface
Embark on a journey through a lush path of outdoor cannabis cultivation with a focus on the autoflowering variety, as we explore the comprehensive guide co-authored by Enzo Schillaci and Jorge Cervantes. This article, rich with insights and detailed instructions, serves as a beacon for cultivators at every level, guiding them through the multifaceted process of growing autoflowering cannabis outdoors. From the seedling's first emergence to the final stages of harvest, this guide intertwines scientific knowledge with hands-on expertise, ensuring that your cultivation journey is navigated with confidence and proficiency.
Dive deep into the specifics of the Northern Lights Auto strain, exploring its life cycle, understanding the pivotal role of light, nutrition, and care at each stage, and garnering insights into maximizing yield and potency. From germination to the final harvest, this guide illuminates your path with practical tips and expert advice, ensuring your journey through cannabis cultivation is both enlightening and productive. The article not only provides a step-by-step guide but also addresses potential challenges and common misconceptions, ensuring a holistic and well-rounded understanding of the cultivation process.
Cannabis cultivation, especially outdoors, brings with it a unique set of challenges and controversies, such as optimal conditions, nutrient requirements, and pest control, which this guide addresses with solutions and alternatives that are both practical and actionable. It demystifies the complexities of cannabis cultivation, breaking down the process into digestible segments, making the art and science of cannabis cultivation accessible to all.
Guiding us through this exploration are Enzo Schillaci and Jorge Cervantes. Enzo, originally from Argentina and having grown up in Amazonas, Brazil, brings a fresh and insightful perspective to the table, ensuring the guide is both accurate and relatable. His global travels and experiences, coupled with his role as a full-time cannabis writer at Fast Buds autoflowering genetics, lend a modern and practical perspective to the guide.
Introduction
Cannabis cultivation evolved in the best possible ways by creating autoflowering strains. These varieties are much stronger, producing high yields extremely quickly and they’re flexible enough to forgive newbies’ mistakes. Still, you won’t get far with your marijuana plants if you don’t have high-quality autoflower seeds.
Choosing the Perfect Autoflowering Strain
Not all cannabis strains are suitable for outdoor growing so make sure to pick the right variety to get your plants thriving. There are some characteristics you have to think of when picking your cannabis plants for outdoor growing:
| Outdoor growing characteristics | |
|---|---|
| Climate | Growth |
| Climate plays a crucial role in growing autoflowers. Make sure you take the overall temperatures in the environment to be sure your cannabis plants can grow. Some strains are more forgiving to diseases, mold and pests than others. | Depending on where you live, you might prefer smaller marijuana plants so check the characteristics of the plant. |
Other things you should think about when picking autoflowering seeds are the effects, the flavor, the cannabinoid profile, the potency and the aroma.

If you don’t know where to start with outdoor autoflowers, check out our own strains:
- Northern Lights Auto
- Amnesia Haze Auto
- Blueberry Auto
- White Widow Auto
- AK-47 Auto
Selecting the Ideal Location
You got the right seeds but now you need the right place to get started with your autoflower. Still, it’s not that easy because cannabis plants need plenty of light.
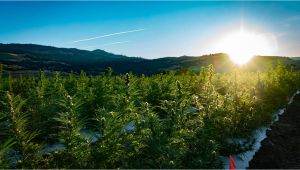
Sunlight Exposure
When growing autoflowers, you need to make sure they get at least 12 hours of light per day, if not actually 18 hours. The ideal location for autoflowers growing is under direct sunlight.

Wind Protection
Autoflowers don’t need to be in a tropical environment with strong winds. Actually, the best place where you can grow your cannabis plants is next to a fence where it’s protected from strong winds. If you don’t have a fence, think about building some temporary setup that will shield your plants. This will make sure you don’t end up with broken stems or branches.
Privacy and Security
Depending where you live, you might not want your plants in the neighborhood spotlight so make sure you pick a secluded place. Privacy screens and hiding techniques like using other tall plants are a good way to cover up your plants.
Preparing the Soil for Optimal Growth
One thing indoor and outdoor growing have in common is the need to prepare the soil to allow your autoflowers to absorb the nutrients without any issues such as waterlogging or root rot.
Soil Composition
Why is the composition of the soil important if you already have soil from the ground outside, you might ask? Well, this is where all the essential nutrients are absorbed by your cannabis so it shouldn’t be a surprise it has some requirements. Let us give you the recipe for the best mix: peat moss (40%), coco-coir (30%), perlite/vermiculite (20%) and manure or compost (10%).
Soil pH
The ideal pH level for autoflowering cannabis is around 5.5 to 7.0 so slightly more acidic than the ground you have in your garden. Use a kit to measure the pH and don’t hesitate to adjust it if you notice any fluctuations.

Preparing the Planting Site
Loosen up the soil for about 30 cm (12 inches) depth and remove whatever could get in the way of your root’s growth. That means removing roots from other plants, rocks and anything else that could impact the growth. Next, add the soil you’ve already prepared and mix it well.
Planting and Germination
Wondering if you should germinate your autoflowering seeds before planting them? The answer is, it’s up to you. Whether you do it directly in the soil or you do it inside and then move the seedling to the soil, you will have autos regardless.
Direct Sowing
Add the seeds of your chosen strain about half an inch deep in the soil. It takes about 5 to 10 days to start seeing the first seedlings. Still, don’t push too hard on the soil once you’ve planted the seed.

Indoor Germination and Transplanting
To germinate indoors, use the preferred method (although we recommend using the paper towel method or a germination tray) to get your seedlings started. When you’ve caught a glimpse of the seedlings, leave them under LED/fluorescent light for a full day. Just as the first leaves appear, it’s time to transfer the plants to the soil. But remember to do it carefully because the roots are quite fragile.
Nutrition and Fertilization
Not sure what type of nutritional supplements to add to your plants? Well, your autoflowers won’t be messed up if they miss a few hours of light. However, if you miss one too many feeding sessions, then it might get hard to get back on track.
Macronutrients
Nitrogen, potassium and phosphorus are the main macros any autoflower needs to grow. During the vegetative stage it requires more nitrogen, followed by the flowering stage where the primary macros are phosphorus and potassium.
Micronutrients
Don’t forget that micronutrients like zinc, calcium, iron and magnesium are also important for your autoflower’s growth. You won’t have to add a lot so the usual ferilizers should do the trick.

Organic Fertilizers
Guano, fish emulsions or compost are a great way to add extra nutrients to your plant’s soil. However, before adding any type of fertilizers to your soil, read the packaging instructions to avoid creating imbalances.
Monitoring Nutrient Levels
Don’t let nutrient deficiencies compromise your harvest. Track the soil’s composition and watch out for any signs of under or overwatering.
Watering Techniques
Too much or too little water can really mess with your autos. That’s why you need to learn what’s the right way to water and to feed without ruining the soil or the harvest.
If you want a fool proof way to recognize when it’s time to water, then put your finger in the soil and feel for any signs of moisture. When the soil is still wet, then wait for a couple of days before you water.
A good time to add water to your plants is close to sunrise when water won’t evaporate fast and it will have enough time to travel to the roots.
But if you don’t want to be restricted by a set schedule, then set up a drip irrigation system to get your plant’s soil moist. And if you have many plants set up in a line, soaker hoses are another great solution.
Pest and Disease Control
You have to do something to keep your garden safe from infestations and diseases. For that, start small:
- Don’t let the garden become a jungle: tidy up, remove debris and dead leaves.
- Add beneficial insects like ladybugs and lacewings that will keep harmful invaders in check.
- Companion plants like dill, marigolds and yarrow can also protect your autoflowers’ surroundings.
- Use nets and fences to keep the bigger animals at bay.

Pest Control
There are several ways you can use to combat pest infestations and some of most known are:
- Physical removal of pests
- Neem oil, insecticial soap or diatomaceous earth
- Insects to control infestations
Disease Control
Diseases develop in highly humid environments where the moisture levels promote mold and mildew buildup. To avoid this, keep the autoflower airy by pruning the lower branches and use organic fungicides like potassium bicarbonate and copper-based sprays to treat infections.
Training Techniques for Autoflowering Cannabis
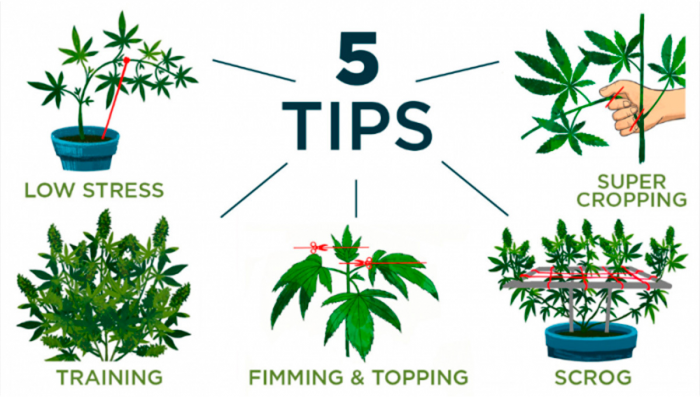
Training techniques are essential if you want to get the most out of your autoflowers. Low-stress training methods are a great starting point to promote an even canopy and to maintain the autos healthy and productive.
If you bend the branches and tie them down you allow light to reach even more surface of the plant and a better airflow that would lower the risk of infections.
Another effective method is the ScrOG technique where you install a net that makes the branches grow into a flatter canopy.
Harvesting and Curing
Harvesting and curing require more attention and effort from you, as well as attention. These stages have a high impact on the flavor, aroma and potency of the final product so it’s only natural you’ll want to do it right.
Harvesting
When your automatic cannabis reaches the pre-harvesting stage, it’s time to keep a close eye on the trichomes. You’ll know when they’re ready when they’ve transitioned from clear to milky to amber hues.
To harvest your cannabis, you can either cut the entire plant, just the branches or harvest the top buds to allow the bottom half to continue maturing.

Drying
When drying buds, it’s important to recognize the exact moment when it’s time to cure them. If they get too dry, they’ll lose flavor and potency and you might be left with nothing but brittles. If you add the buds to the curing jar and they still have a lot of moisture, then they might develop mold.
One to two weeks at 60 to 70°F (15 to 21°C) in a room with good airflow and moderate humidity levels (55 to 65%) should be enough for your buds to dry. It’ll be obvious when the buds are ready because the color of the trichomes will change from transparent to cloudy if not amber.
Curing
For some growers, curing is the worst stage because the quality of your buds depends on the amount of time you’re leaving the buds to develop flavor and potency.
Start the curing process by detaching the buds from the branches and put them in a glass jar or to an airtight container. Don’t fill up the container to the brim in hopes you’ll save space. Two thirds is just right to allow oxygen to get through the buds when you open them to release moisture. Remove the cap of the container once a day for the first week, then switch to once every couple of days for the next two to three weeks.
Be patient and don’t rush the curing process. The more time you wait, the more you’ll enjoy flavorful and highly potent buds.
Benefits of Growing Autoflowering Cannabis Outdoors
Cultivating autoflowering cannabis is much easier and quicker in comparison to photoperiods. Some unbeatable benefits that make it all worth it:
| Growing autoflowers outdoors | |
|---|---|
| Cheaper | You don’t need to invest in air control, lights and measurement tools. |
| Direct sunlight | Autoflowers will enjoy a natural spectrum of light that will make them thrive and grow higher yields. |
| Bigger plants | Plants grow taller and produce more buds. |
| Ecological | our garden’s footprint is much smaller. |
| Easy to keep | You don’t need to look after the plants as much as you’d do in indoor setups. |
| Pest control | Natural beneficial insects already present in nature will keep harmful pests at bay. |

Additional Tips for Success
You can always do more for your little plants. Whether it’s the soil, or the light, here’s a few tips on how to optimize the grow space:
- If you want perpetual harvests, then plant more cannabis strains after a few weeks from your first plants.
- Follow the forecast religiously and act according to the weather. Protect your plants if there are severe storms, snow or wind.
- Track the autoflower’s development so you know what to do in the future. Add info about each growing stage, the type of nutrients, the strain, problems and solutions.
- Use high-quality seeds to increase your plant’s chances of germination and growth rate.
- Try out different strains to see which one works best in your environment.
- Don’t be a loner in your outdoor growing journey. Engage in forums and get in touch with experienced growers to learn how you can improve your techniques,
Selecting the Right Autoflowering Strain
The right strains can make or break a harvest so make sure to pick the right type of autoflowers for outdoor cultivation.
- Get seeds that work with your region. Not all outdoor autoflowers grow well in harsher climates and the same applies for hotter regions.
- If you are a newbie, use strains that have a low level of difficulty. You can find some awesome strains that will make your experience much more enjoyable.
- Some autoflowers produce more than others so get a variety that’s good for your space.
- Check the ‘technical sheet’ to know what to expect when it comes to flowering time.
- Each variety has its own particular flavor profile so start with a strain that catches your eye in terms of flavor, aroma and taste.
- The effects of your strain depend on the THC, CBD and cannabinoid content. Some varieties will make you euphoric, others will remove all types of pain and some will make you giggle for hours.

Choosing the Ideal Location for Outdoor Cannabis Growing
A great spot for growing autoflowers is in a garden or a location where there’s lots of sunlight and it’s away from peeping eyes.
When thinking about sheltering the plants in case of extreme weather, plant them close to trees, bushes or fences for some natural protection. Don’t forget that even if your plants are outside, rain is not enough water.
Vermiculite, perlite or coco-coir are a great way to improve drainage in the soil so don’t hesitate to add them to the soil mix. And lastly, choose a location where your plants can grow without being limited by space.
Preparing the Soil for Autoflowering Cannabis Plants
The soil is the source of all the magic you autoflowers create. So when you plant an auto strain, be aware that you’ll need to keep track of its health quite often.
Autoflowers thrive in acidic soil but check the pH is not lower than 6 and not higher than 7. If you’re not confident enough to make your own soil mix, there are already-made mixes you can buy in stores.
Fertilizers are not your enemy. As long as you use them based on the instructions from the manufacturer you’ll give your plants everything they need and more. Blood and bone meal, kelp along with manure and compost are great options for soil quality improvement and water retention.
Build some structures that will help your autos grow like stakes, to maintain consistency during the development of the grow stages.

Planting and Germination of Autoflowering Cannabis Seeds
You can plant the seeds in soil directly from the package, but if you want higher chances of germination, then get the seeds started inside by using wet paper towels. By doing this, your seedlings will have a good jump start when you transfer them to the soil.
Create a small hole of one quarter to half an inch (0.6 - 1.2 cm). Cover it with soil without putting on too much pressure and add water slowly, you don’t want to disturb the ground.
As long as you ensure the environment is warm at around 68 to 77°F (20 to 25°C), you’ll see seedlings in 3 to 10 days.
Nutrition and Fertilization for Autoflowering Cannabis
Fertilizers are a great way to supplement your autoflowering plants with beneficial micronutrients that might not be present in the usual feeding water. The market is full of organic and synthetic fertilizers so you’ve got lots of choices that will work for your plants.
Another thing you need to be on the lookout for is the deficiencies and toxicities that can build up if you don’t use the right amount of nutrients based on the growth stage.
Watering Techniques for Outdoor Autoflowering Cannabis
If you don’t have a huge cultivar, there’s no need to invest in highly industrial watering equipment, but if you have more than three plants, then start thinking about using a setup for watering.
The best technique to water your autos is by doing it based on necessity and deeply. Still, don’t make the watering schedule a life or death situation. The quantities of water vary based on the outside temperatures, humidity levels and the rain might also have a role in it.
Whether you prefer using manual watering or the drip system, water in the morning when you won’t have to deal with high evaporation rates. For outdoor cultivation, maintain the soil moist and sprinkle mulch like straws or wood chips so it doesn’t dry out that quickly.

Pest and Disease Control for Outdoor Cannabis Plants
Pests and diseases are harmful both indoors and outdoors, therefore, the first thing you can do is to keep your space as clean as possible. Remove weeds, dead leaves and branches while checking the autoflowers for any signs of diseases and infestations.
To lower the risks of pests, IPM strategies facilitate a safer environment for your plants where you don’t have to use harsh chemicals and harmful pesticides. By making small changes like using organic fungicides you prevent damaging the autos structure.
Use companion plants to distract any dangerous insects and to improve the soil.
Training Techniques for Autoflowering Cannabis
We’ve mentioned training techniques such as LST, but it doesn’t stop there. Another great method to help your plants grow better, but not recommended for beginners, is topping. This technique requires cutting the main tip so your plant grows bushier on the sides.
Pruning and defoliating lets air and light reach the lower parts of the autoflowers. Airy bottoms promote healthier growth by minimizing mold and mildew development.

The Significance of Sunlight and Light Cycles
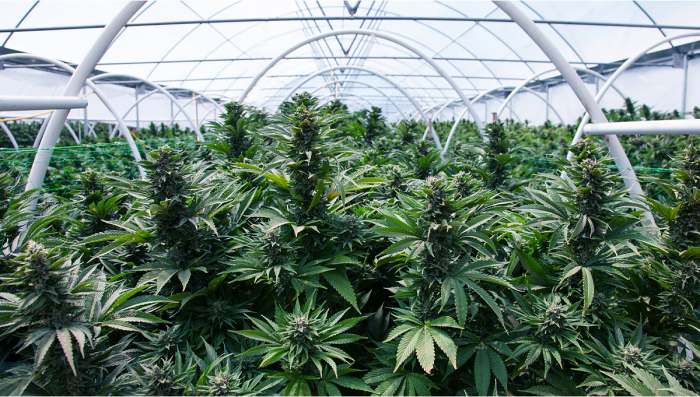
Light, and sunlight in the case of outdoor autoflowers, is extremely important to help your plants start the process of photosynthesis and the transition to the vegetative and flowering stages.
Photosynthesis is an essential process that all plants go through to grow so keeping your autos outside allows the leaves to catch the full spectrum of light. This will result in bigger and stronger plants.
When your autos reach the vegetative stage, the long exposure to sunlight promotes more vigorous growth and will help with canopy development.
Lastly, auto strains are not as dependent on light to start producing flowers because they do it automatically, in comparison to photoperiods that need a strict schedule. Expect to see flowers after four to five weeks of growing in your garden.
Expert Opinion by Jorge Cervantes - Co-Author:
Together with Enzo Schillaci, we’ve added everything there is to know to start your own outdoor autoflower cultivation. In the past 40 years I’ve spent in cannabis cultivation, the evolution of growing techniques and the birth of autoflowering strains has made growing outdoors a more achievable experience for all levels of expertise.
In this article, we’ve covered all the steps any grower should make to ensure a great harvest from picking the right seeds and germination, to training techniques, curing and pest control. Each stage outlined here will give you a step-by-step guide on what to do and what to be aware of when cultivating autoflowers outdoors.
Although growing autos outside is more about trial and error due to factors such as the soil type, the climate and sunlight exposure, these guidelines are universally applicable. A good watering and feeding schedule along with regular check and light can help autoflowering cannabis grow despite any potential challenges.
No matter the level of experience and expertise of the grower, these guidelines should give a clear understanding of what outdoor autoflowers growing entails. Remember that autos tend to be more forgiving, so don’t hesitate to adjust and adapt based on the environment, and the plant’s needs. With care and attention, there’s no reason why you won’t enjoy plentiful harvests.
Extra Tips for Growing Autoflowering Cannabis Outdoors
- Keep track of the seasons: As seasons change, the temperatures also change and can affect the growth progress of your autoflowering cannabis. When planting outside,
- Grow in containers: Growing your autoflowering cannabis outdoors directly in soil can be restricting, so consider cultivating your plants in containers. This will allow you to move them based on the sunlight and you’ll also be able to protect them better.
- Maintain your garden secure: Depending on where you live, your garden might catch the eye of thieves. Use tall fences, cameras and light to keep the place safe.
Conclusion
Outdoor growing is a rewarding experience that will give you high yields and robust plants. Don’t rush when picking the strains you’ll cultivate and keep your growing space as clean as possible to avoid disease and pests infestations. Be patient, give it light and follow a good feeding schedule and you’ll enjoy tasty buds in no time.

Comments